Raspberry Pi as Web Server
Generally Web server is a computer where the web content is stored which is used to host websites. Website is collection of web pages while web server is a software that respond to the request for web resources. There exists other web servers also such as gaming, storage, FTP, email etc. All computers that host Web sites must have Web server programs, that uses HTTP (Hypertext Transfer Protocol) to serve the files that form Web pages to users, in response to their requests, which are forwarded by their computers’ HTTP clients.
Dedicated computers and appliances may be referred to as Web servers as well. Here we are going to use our Raspberry pi as a dedicated web server and our laptop as a client accessing the web server. The process is an example of the client/server model. All computers that host websites must have have web server programs.
Leading Web servers include Apache (the most widely-installed Web server), Microsoft’s Internet Information Server (IIS) and nginx (pronounced engine X) from NGNIX. Other Web servers include Novell’s NetWare server, Google Web Server (GWS) and IBM’s family of Domino servers. Here we will try installing Apache and wordpress in our Raspberry Pi.
Components & Softwares
| Component | Specification |
|---|---|
| Raspberry Pi | Raspberry Pi 3 recommended |
| Memory Stick | 8 GB (minimum) |
| Card Reader | Any Read/Write Memory Stick |
| Power Supply | 5V -1A (micro usb |
| Ethernet Cable | RJ45 |
| Operating System | Raspbian Stretch |
| Software's to download | Windows Users | MAC Users |
|---|---|---|
| Boot Image Writer | Win32 Disk Imager | Etcher |
| SSH | PuTTY | Mac Terminal |
| Remote Desktop | Microsoft RDC | Microsoft RDC |
| To Scan IP | Advanced IP Scanner | IP Scanner |
| To Transfer Files | File Zilla | File Zilla |
Google these software’s and download . You can use any alternate software to do the job. Here we are not going to use any monitor , keyboard and mouse, our laptop is more than enough.
Installations
Let’s start from scratch . I assume you have the following components/materials mentioned above. First we are going to prepare our hard drive for our server, nothing but the memory stick. Choose a memory stick not less than 8 GB so that there won’t be any memory shortage or overloading issues.
Go to this website (https://www.Raspberrypi.org/downloads/raspbian) and download the latest raspbian OS and unzip it. It takes some time, meanwhile download the Win32 Disk Imager which we will be using to write the raspbian.img file into the memory stick. Mac users Download Etcher to write the raspbian image into the memory stick.

The memory stick will be renamed into boot . Open the boot drive, you can see the contents of the boot, in that add a text file named “ssh” (with double quotes) not in .doc or .txt format but in all files format. Mac users create in any format and remove the format by renaming it.
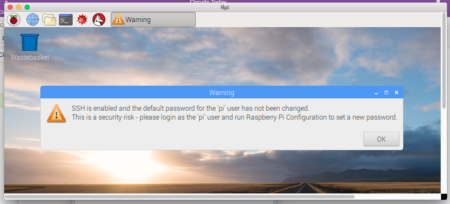
Note: In earlier versions of OS, SSH is enabled by default, later for security reasons it was disabled. To enable SSH we are adding that “ssh” file with whatever content in it.
Booting Pi
Now insert the memory stick in RPi . Power the RPi using the power adapter, your mobile phone charger holds good. Connect your RPi with laptop via Ethernet cable . For first time booting we need ethernet cable, after that we can connect the RPi wirelessly via Remote desktop connection(RDC) . Laptops without ethernet slot, connect your RPi to your router and login to your router to find the IP address of the RPi. Now we need to find the IP address of the RPi. After powering the RPi, the blinking of green light indicates that RPi is booted up. Ethernet lights will also blink to indicate connection establishment.
Windows Users
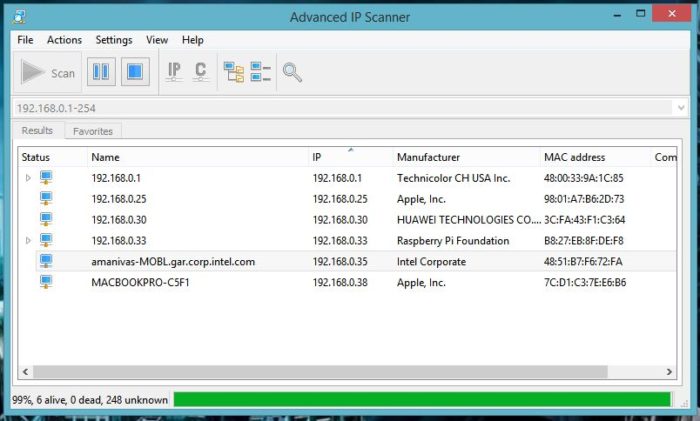
Now open Advanced IP scanner and start scanning. It will list the devices connected with your host. In that list Raspberry pi will appear. Note down the IP.
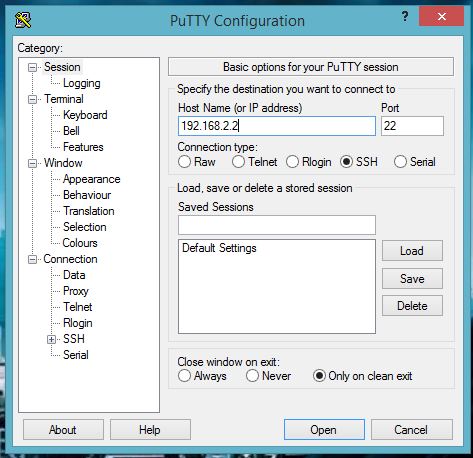
Now open the PuTTY and in Host Name provide the RPi IP and port as 22 and connection type as SSH as in the figure below and then click open.
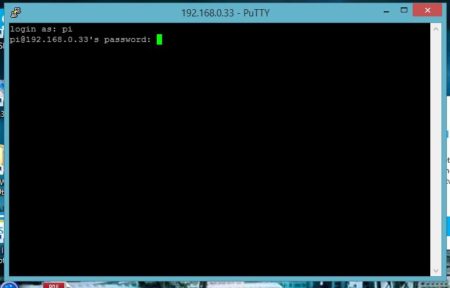
Your IP will differ from mine. A terminal window open asking for password as below. In that provide password as Raspberry and click enter. Now you’re logged into RPi, let’s configure it.
Mac Users
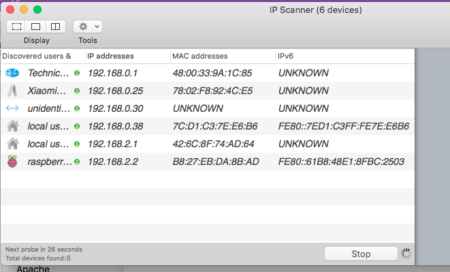
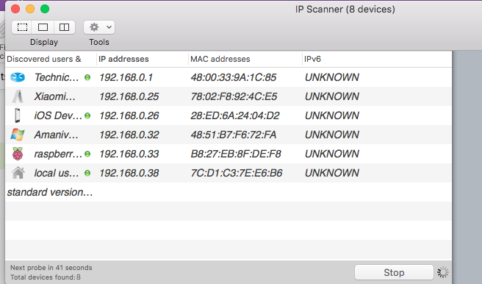
Open your IP scanner and scan for the RPi IP address, it will list with manufacturer’s details as shown below, note the IP. Now open your terminal and type the following command and click enter.
ssh pi@198.162.2.2
It will ask for password , type Raspberry as password and click enter, password won’t be visible. Now you will be logged into RPi via ssh. Lets configure the RPi.
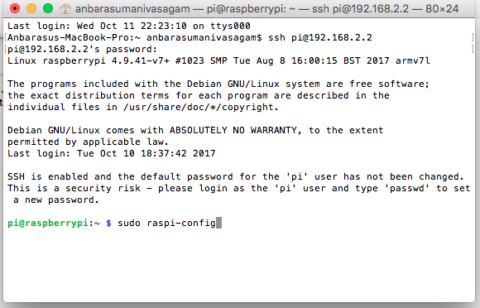
Raspberry Pi Configuration
In RPi console type the command below and press enter.
sudo raspi-config
It will open the configuration window with nine options as shown below. You can use up, down, right left arrow keys to navigate and enter to select.
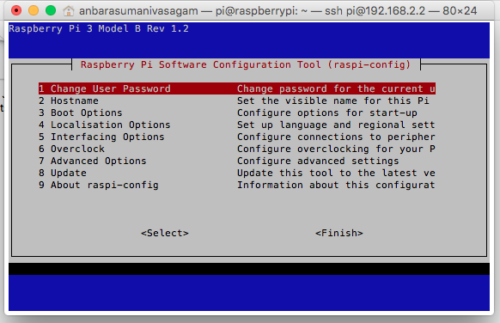
- As it says you can the login password of RPi
- Hostname will be Raspberrypi by default, you can change the hostname here
- There are three boot options
B1 - You can choose your boot options either as text console or Desktop GUI (choose GUI)
B2 -  Boot will wait until a network connection is made
B3 - To choose a splash screen on boot
- To set your global location and Time Zone
- Interfacing options
P1 - Enable /Disable camera in RPi camera slot

P2 - Enable /Disable SSH (Do)

P3 -Enable /Disable VNC viewer (Do)

P4 - Enable /Disable automatic SPI pins on RPi

P5 - Enable /Disable automatic I2C pins on RPi

P6 - Enable /Disable serial port pins on RPi

P7 - Enable /Disable 1-wire interface

P8 - Enable /Disable GPIO pins on RPi
- Overclocking of Pi cant be done by this way.
- Advanced Options
A1 - Expand the file system of RPi in the partition. (Do )

A2 -  For some displays directly connected to RPi to avoid the black border.

A3 - To choose the size of RAM provided to GPU

A4 - To choose the Audio output via HDMI or 3.5mm Jack. (choose auto)

A5 - To choose screen resolution

A6 - GL driver for 3D displays
- Update the OS (Do)
- About the Configuration
After exploring the config options, type these commands to update,upgrade and reboot.
Sudo apt-get upgrade

Sudo apt-get update

Sudo reboot
Note: If it asks for permission type Y to grant permission.
Again use SSH to login back into the RPi. Now we will connect our RPi to you r local network / Mobile hotspot to remotely connect RPi. For this first type this command below to get the RDC GUI interface. Now we can login using remote desktop connection (RDC).
sudo apt-get install xrdp
Remote Desktop
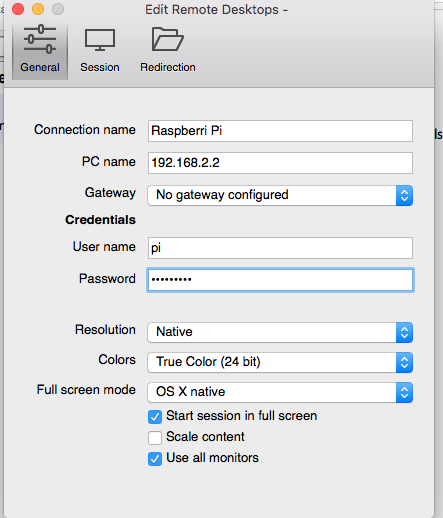
Now open your RDC software in your laptop and fill in the credentials as below. Use your RPi IP address.
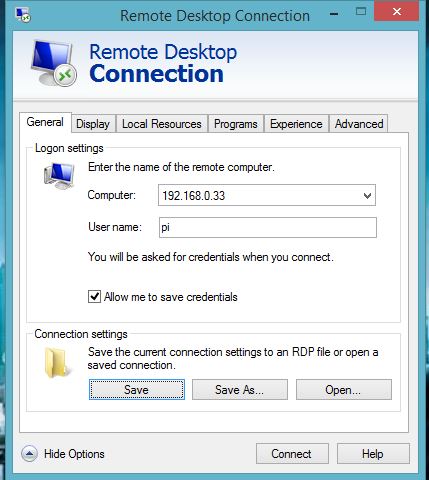
User name – pi
Password – Raspberry
Then start the session , you will be taken into the login window of xrdp GUI. If you selected auto login in boot option of raspi-config, it will automatically take you to the home screen of RPi which looks like this.
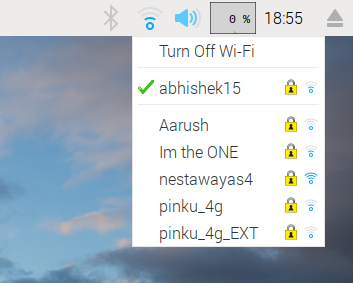
Now connect your pi to your wifi router / mobile hotspot by clicking the network icon on the right corner of the screen. Choose your router and enter the passkey to connect.
Once its connected, reboot it and you can remove the ethernet cable. On reboot the RPi will automatically connect to your router. Now open your IP scanner again to find the new static IP of your Pi. Mine will look like this
Again reconfigure/edit your RDC credentials to login wirelessly and start your session. Now you can place your RPi anywhere in your wifi range and you can work on that wirelessly.
Note: Your laptop and RPi has to be connected to the same router for RDC.
Installing Servers
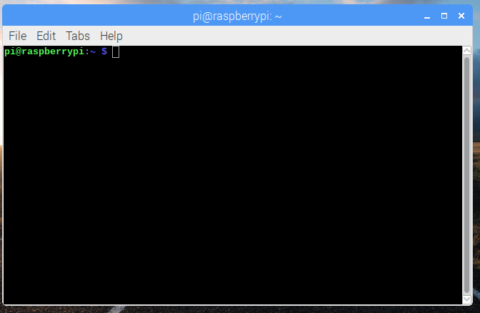
Now open the terminal window in RPi desktop , you will see a similar screen like the SSH window , actually this is the window we accessed through SSH. Now we are going to install the servers for our RPi one by one.
sudo apt-get install apache2

sudo apt-get install mysql-server

sudo apt-get install mysql-client

sudo apt-get install libapache2-mod-php5 php5 php-pear php-mysql php5-curl php5-gd
You can choose your latest apache version, I’m using apache2 here. After getting the packages it will ask for permission to install, provide Y.
While installing these servers , it would ask for ‘root’ password creation, if not without password it will install your server. we can create the ‘root’ password by typing these commands.
sudo mysql -u root -p                    (It opens a PHP window MariaDB)

SET PASSWORD FOR 'root'@'localhost'= PASSWORD('Raspberry');

exit;
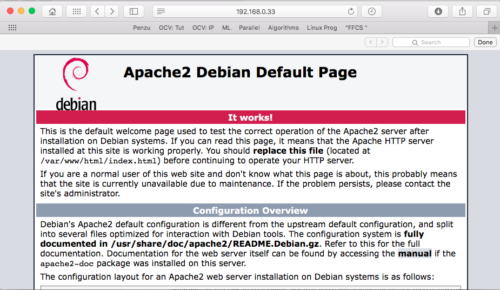
Now go to your browser and type your RPi IP address in the browser and it shows the default apache debian page.
Now we can add files to your server. For that you have change the modification of the folder /var/www where the default index.html file will be there. You can open files folder in your RPi
sudo chmod 777 -R /var/www
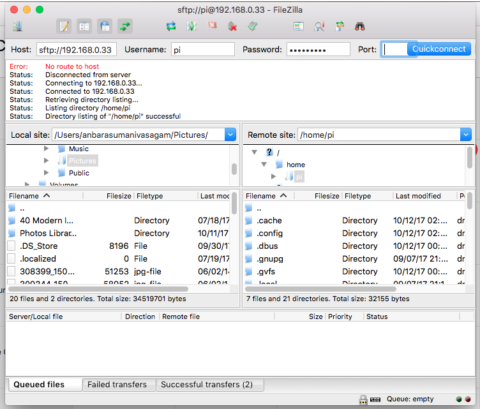
Open your File Zilla software and connect to the RPi by filling the credentials same as RDC. Now drag and drop the files you want in your server from your laptop folders to /var/www/html Remove the index.html file from the folder by using the following commands. Then only you can see the files.
cd /var/www/html
sudo rm *
After adding your files reload and restart the apache server by using the below commands. Then again open the server in the browser by typing the IP address of PI.
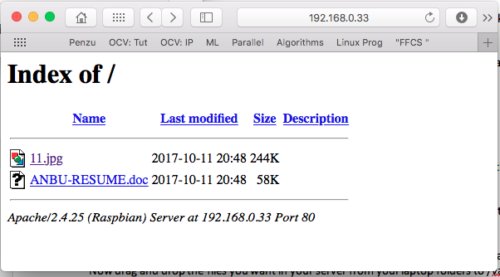
You can build your own website using your index.html or index.php file since that’s the default file the server will display, like 192.168.0.33/index.html or 192.168.0.33/index.php.
WordPress
As we all know wordpress is a easiest PHP open source website creation tool and website CMS. So we are going to install and configure WordPress in our RPi server. Before downloading the wordpress files we need to install a MySQL extension which is needed for wordpress to run on our Debian server.
sudo apt-get install php5-mysqlnd-ms
Now navigate to the directory as follows and download the wordpress target files.
cd /var/www/html/

sudo rm *

sudo wget http://wordpress.org/latest.tar.gz
Now extract the target files and move it to the wordpress files and free some memory by removing the downloaded target file.
sudo tar xzf latest.tar.gz

sudo mv wordpress/* .

sudo rm -rf wordpress latest.tar.gz
You can see the contents of the wordpress by typing ls -a or ls . Now make the data files of the wordpress to be readable by the server by using the command below.
sudo chown -R www-data: .
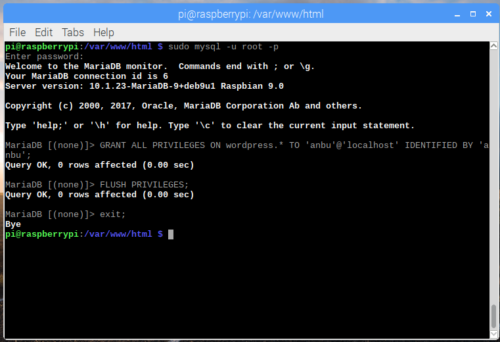
Now we create the user access for our wordpress by logging in to our mysql Maria DB by the below command and press enter.
sudo mysql -u root -p
Provide the password, it will take you to mysql. In that type this command to create the wordpress.
create database wordpress;
Then create user access for our Raspberry pi using this command.
GRANT ALL PRIVILEGES ON wordpress. * TO 'anbu'@'localhost' IDENTIFIED BY 'anbu';
Here I have used my name for user and as well as password.First one is user and last one is passkey. Flush some privileges by this command and exit.
FLUSH PRIVILEGES;

exit;
Restart the server for the changes to come into action. Now its time to configure our wordpress. Open your browser and type your RPi ip and click enter. You should get the wordpress setup window as below.
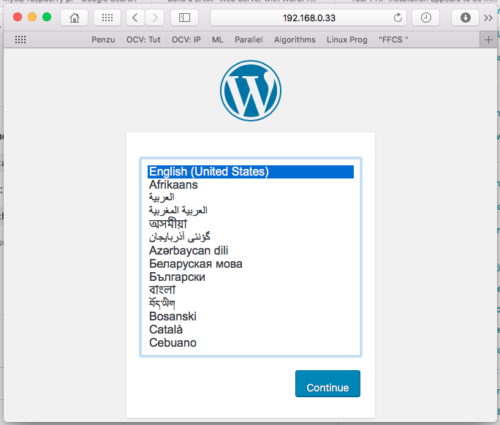
Choose the language as English and continue then a window with wordpress configuration details appear as below. Click Let’s go.
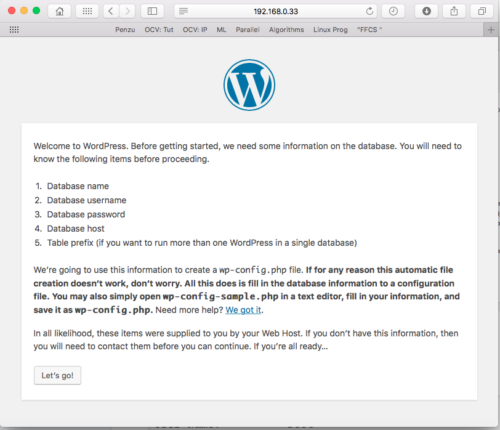
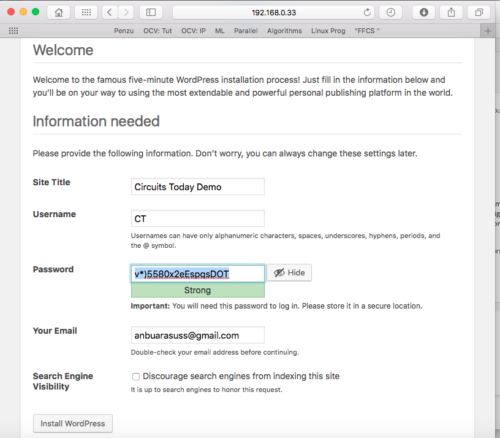
Run the Install. Provide the information needed and install the wordpress.
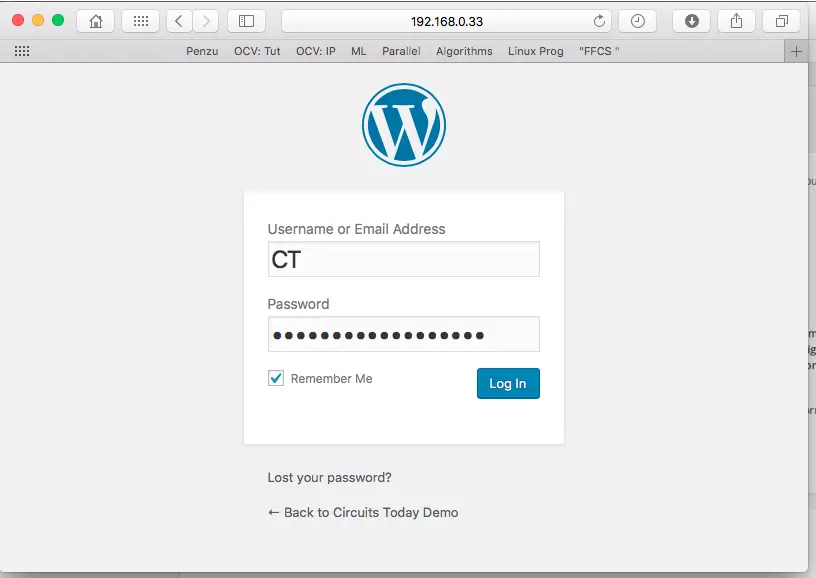
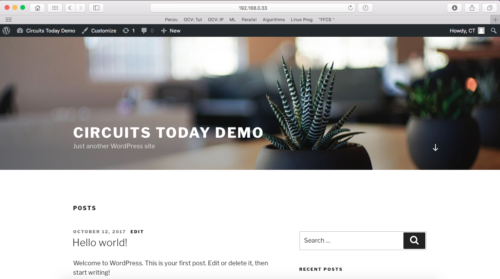
After installing it will take you to the log in window of the wordpress, login using your credentials and boom you’re into wordpress. Now customize your wordpress it’s all yours now.

This is how the default customization looks like.
Comments are closed.