What is ADC?
ADC stands for Analog to Digital Converter. ADC is used for converting the analog input voltage to its digital form. It is necessary for every microcontroller to have ADC in it, as all the microcontrollers work only on digital input and output voltages. So, ADC takes analog voltages and converts them into digital, and gives them to the microcontroller. In the Arduino UNO board, there is a multi-channel 10-bit ADC. Here, 10-bit means that the input voltage of 0-3.3V or 0-5V is mapped into digital values of range 0 to 1023. On Arduino UNO there is a total of 6 ADC pins. These pins are A0, A1, A2, A3, A4 and A5. To understand this in the easiest way, we will be creating a circuit using a potentiometer and an Arduino UNO board. In this circuit, we will use the potentiometer to provide analog voltage to the Arduino UNO.
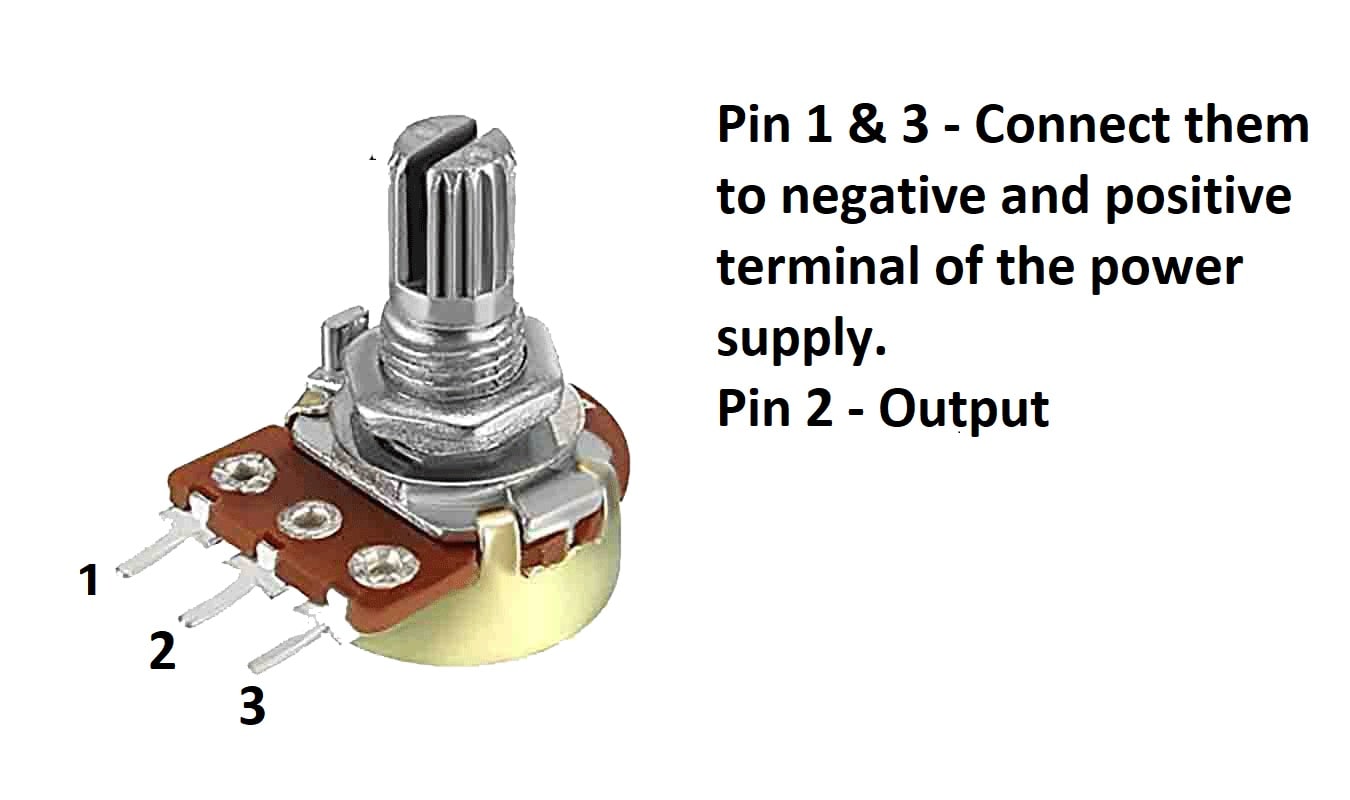
Pin diagram of the Potentiometer
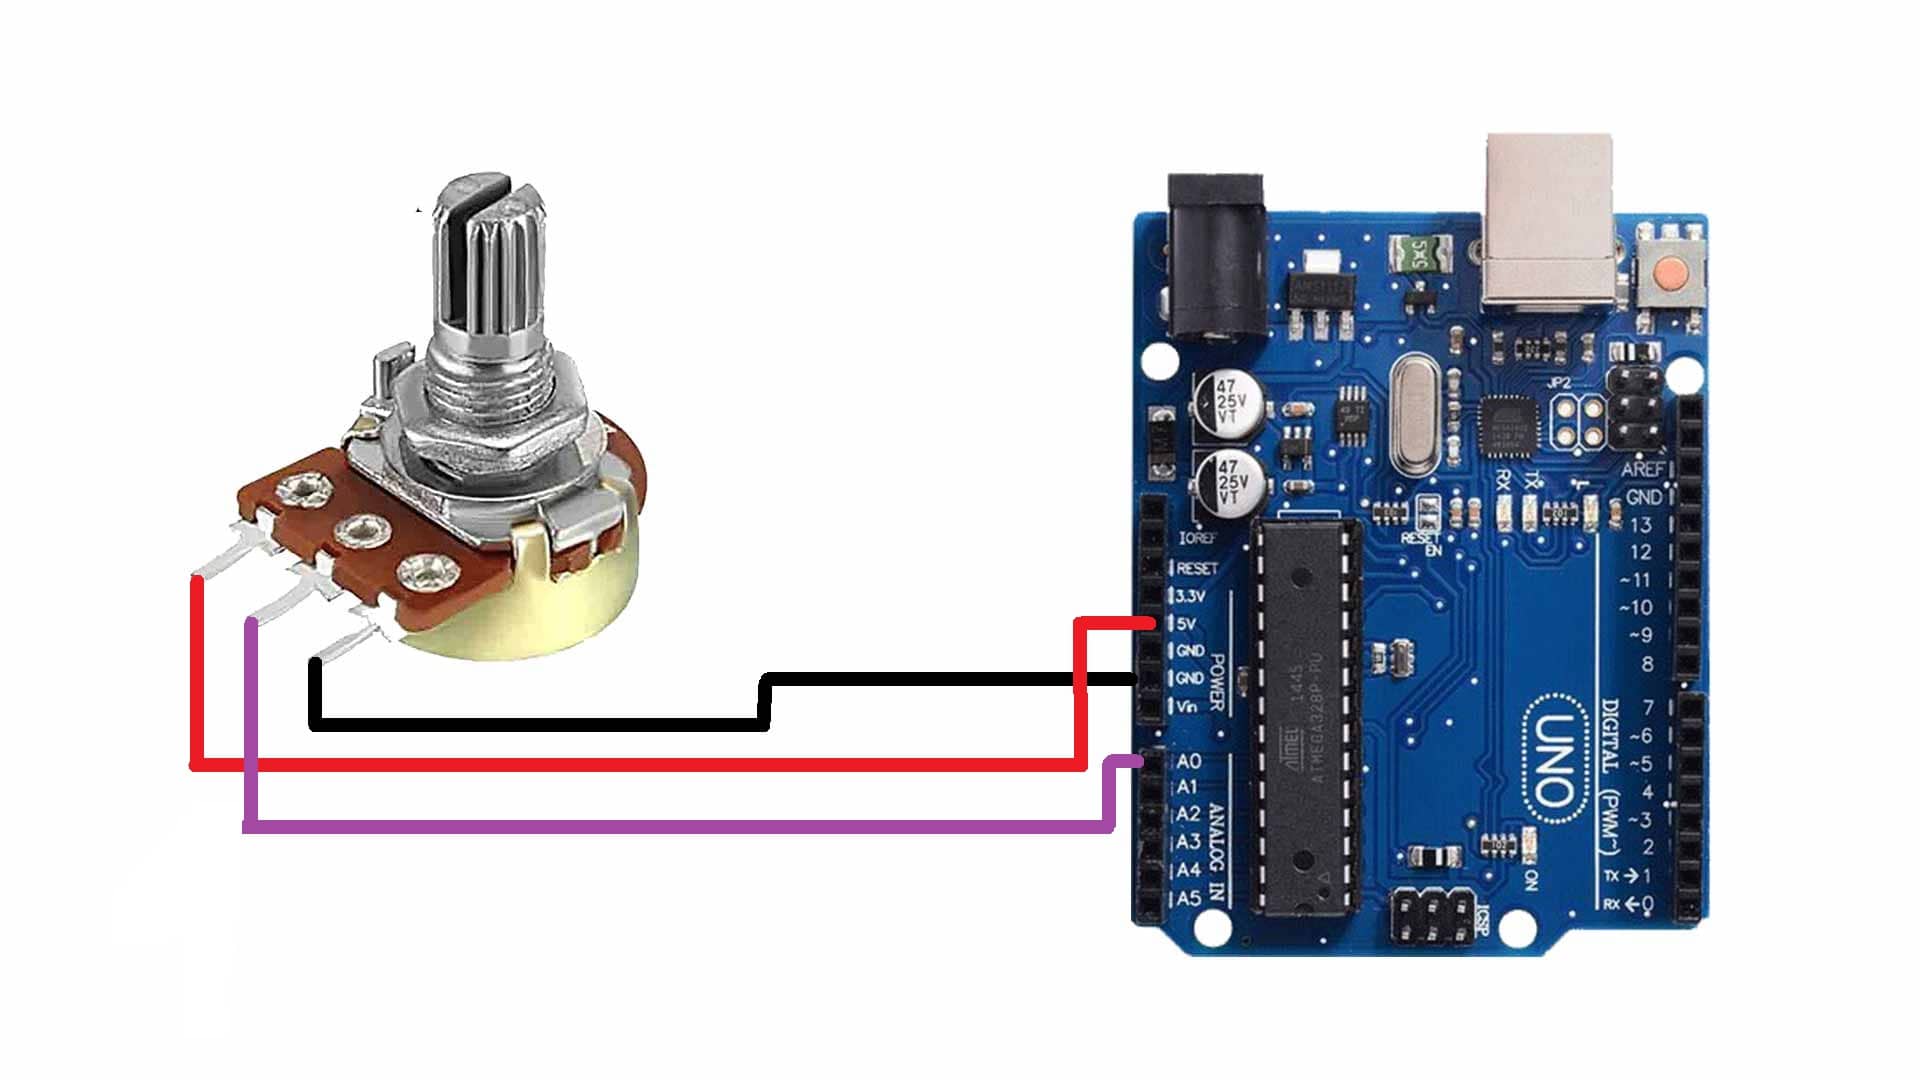
Circuit diagram of Potentiometer with Arduino UNO
In Arduino programming, we will be using the analogRead() function to read and convert the analog voltage into digital. The syntax is: analogRead(Pin_name). Inside brackets, you have to mention the pin from where you want to read the analog voltage. Below is the example code of reading an analog voltage from the potentiometer.
Arduino code for interfacing potentiometer with Arduino UNO
int pot_pin=A0;
void setup()
{
pinMode(pot_pin,INPUT);
Serial.begin(9600);
}
void loop()
{
int pot_data=analogRead(pot_pin);
Serial.print("Pot Data:");
Serial.println(pot_data);
delay(500);
}
Working of code
int pot_pin=A0;FIrst, create a variable name pot_pin to store the pin number where you have connected the middle pin of
void setup()
{
pinMode(pot_pin,INPUT);
Serial.begin(9600);
}
In the void setup() function, first set the pot_Set the A0 pin as input as Arduino will be using this pin to read data from the potentiometer. Then using the Serial.begin(96000) command, start the serial communication with the baud rate of 9600. This is necessary for displaying potentiometer data on the serial monitor.
void loop()
{
int pot_data=analogRead(pot_pin);
In void loop() function create another variable named pot_data to store the data received by Arduino from the potentiometer. We will use analogRead() function for this purpose.
Serial.print("Pot Data:");
Serial.println(pot_data);
delay(500);
}
Print the potentiometer data onto the serial monitor and in the end, give a delay of 500 milliseconds.
Output window
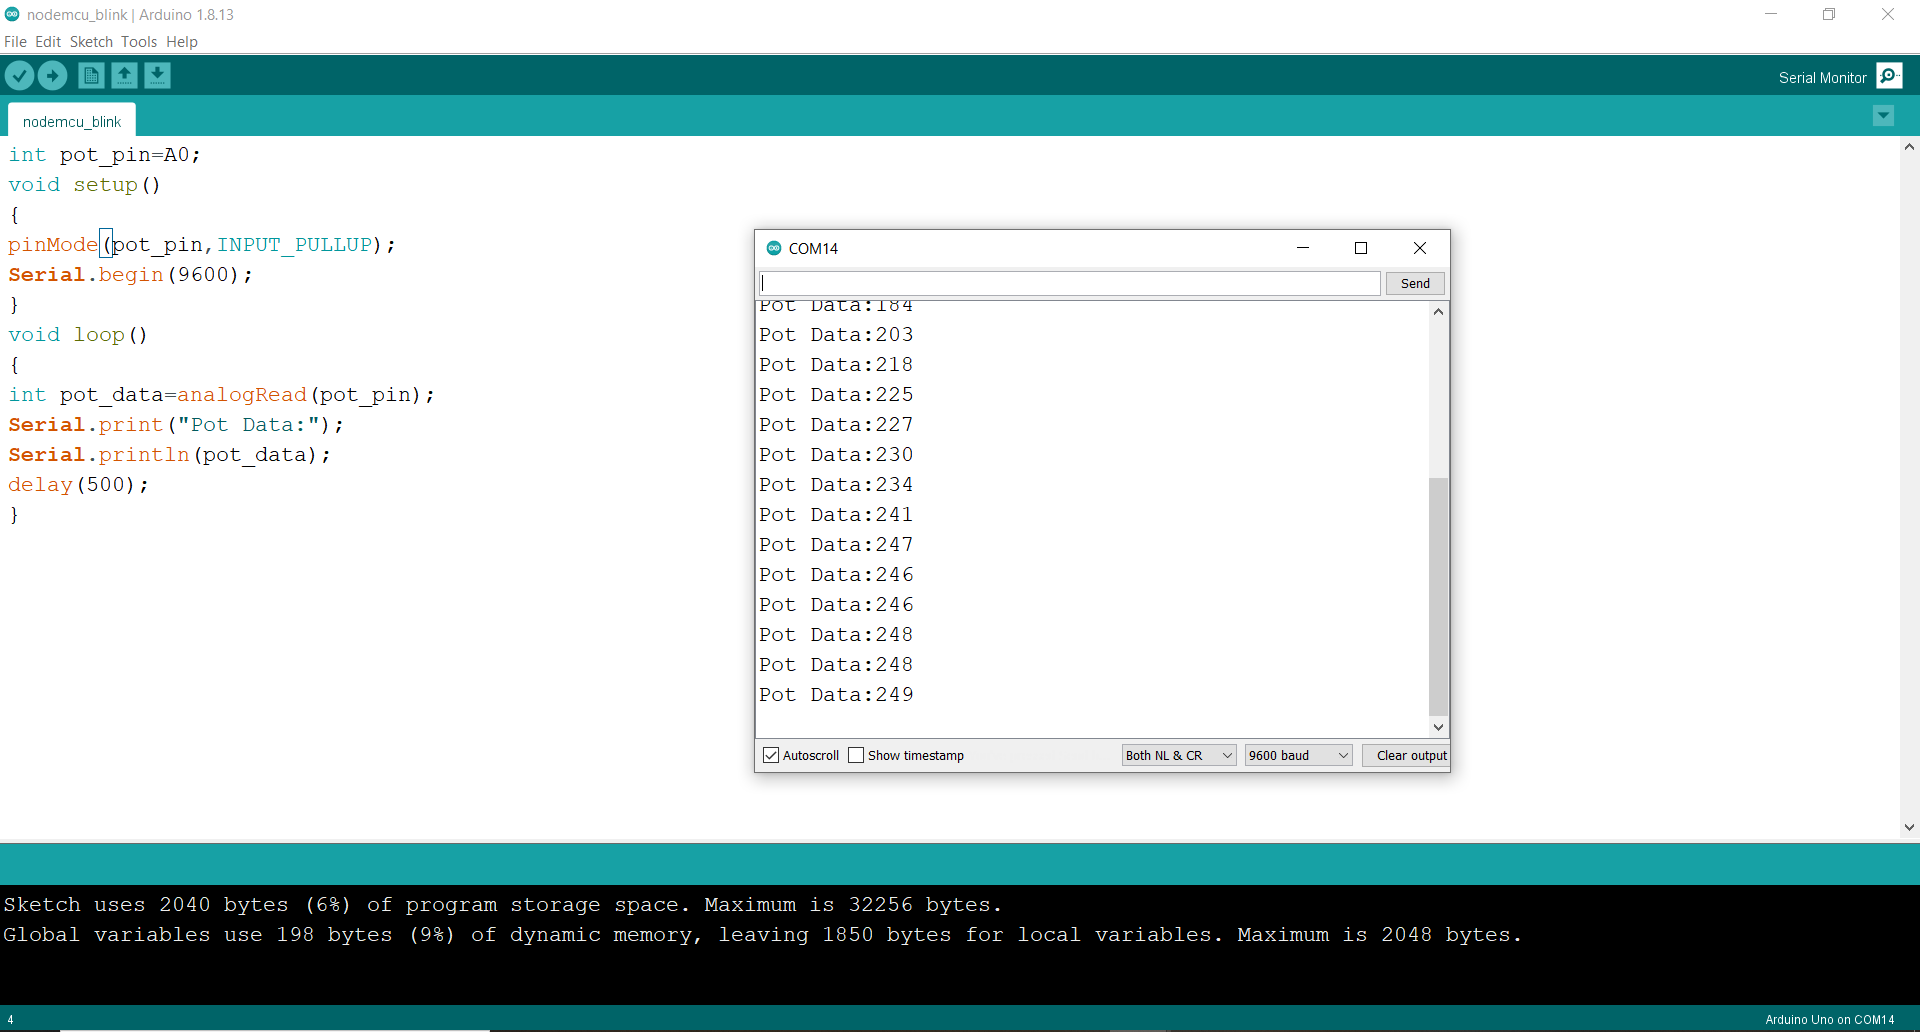
You can clearly see in the serial monitor that we are getting digital values between 0 to 1023 on the serial monitor. The potentiometer is connected between 0 and 5 volts. So, ADC will be getting values between 0 to 5 volts and converting them into the range of 0 to 1023. Suppose the input voltage is 1 volt so its equivalent digital value will be 204. You will be getting 204 on the serial monitor. Similarly, if the input voltage is 2 volts, you will be getting its equivalent digital value 408 of the serial monitor. Like this, all the values between 0 to 5 volts are mapped into 0 to 1023.
Comments are closed.